
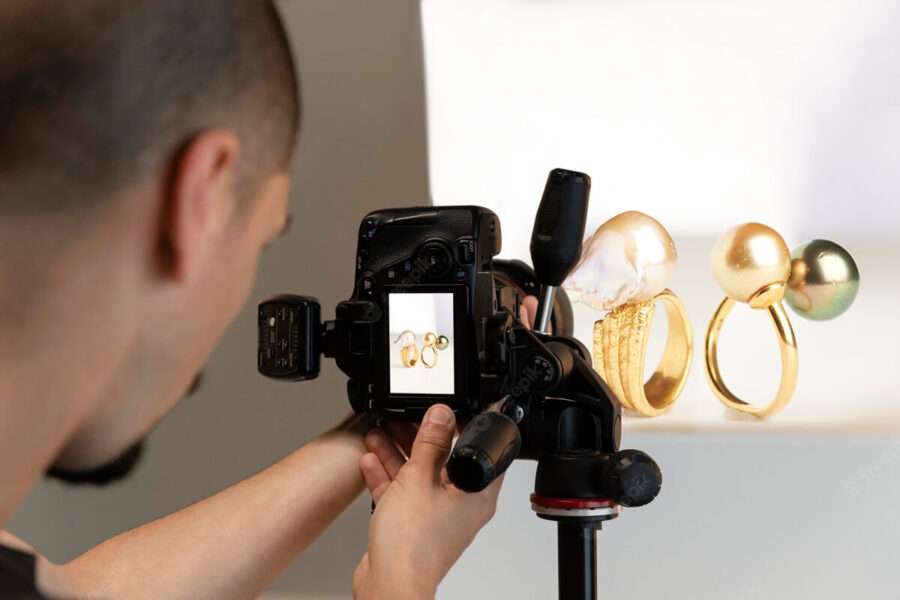
Product photography is the most tedious one as the success of your business depends on it. Your customer will see the pictures and select the product for buying. Jewelry photography falls in the same category. If buyers can’t observe the minute details of the ring, bracelet, necklace, earrings, etc., they will simply get over it. It is necessary to avoid smudges, reflections, and any manipulative lighting. The lighting for jewelry also plays a great role. Background must be selected carefully as it plays an important role, as it will increase or decreasing the texture and color of your images. Find a professional product photographer or an agency well versed in taking high-quality images.
Things Required For Jewelry Photography
- Natural Light: The lighting for jewelry photography must be chosen wisely. Using a Smartphone camera may leave white spots. Professionals must take photographs in their studio by adjusting the light. Beginners can take photographs in natural light.
- Natural Light: The lighting for jewelry photography must be chosen wisely. Using a Smartphone camera may leave white spots. Professionals must take photographs in their studio by adjusting the light. Beginners can take photographs in natural light.
- Camera: Store owners who do not want the expensive photoshoot can ask the photographer to take pictures with a good lens iPhone or Smartphone. However, professional photography must be done with an excellent DSLR lens.
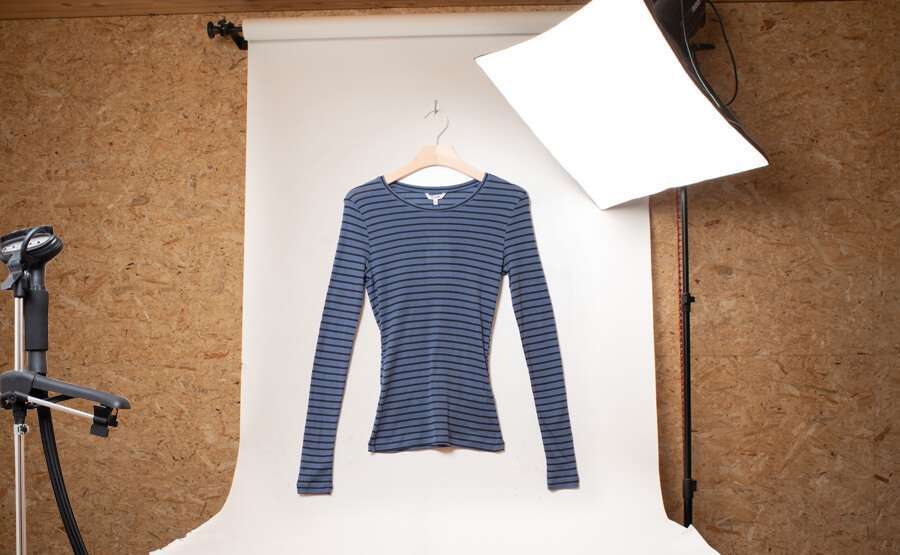
- White Background: To avoid any alteration to the color of the jewelry, white background or paper must be chosen. White reflects the colors, making your image bloom as dark colors absorb the colors. You do not have to use the full range white sheet for clicking the photos. Even the white paper will work wonders too.
- Table: As jewelry pieces are small and not big, so a table with a width of 27 inches will work perfectly well.
- Mannequin Bust: Props are a great way to present your jewelry pieces. Most photographers use mannequin busts for clicking necklace pictures. It enhances the image, and the photography lighting setup plays a significant role.
- Foam Boards: The lighting for product photography plays a major role. The shadow may appear if the jewelry is not placed at the right level. Placing the white foam boards on the table will help brighten up the neckpiece, ring, earrings, etc.
- Tape or Clamps: The white sheet, paperboard, or foam board can keep off from their place. To make sure they are in their place, tapes or clamps do a great job.
Steps to Take Jewelry Photography
The lighting for photographing jewelry plays a major role. It showcases the minute details of the product that will entice the buyers. If the jewelry pieces are photographed in shadow or dim lights, they will reflect white spots. To make things look great, below are a few steps that a photographer must follow.
Use The Right Macro Lens
A DSLR or a Mirrorless camera comes with the kit lens. The kit lens has a short zoom, wide-angle camera, and focal length from 18mm to 55mm. An entry-level kit lens works great for jewelry photography. The 60mm and macro lens kit lenses will work great for creating focused photographs. 1:1 Lifesize representation of the jewelry piece will help make the photograph look detailed.

- Lighting The Jewelry Evenly
The macro photography for the jewelry pieces must consist of the two flash heads or the continuous lights placed on each object’s end. The positions marked are left and right for taking the best photograph. You can order the kit lens from the online stores. They include all the accessories like the flash that attaches to your camera, diffuses, umbrella, and the stand.
The photographer must set up umbrella lighting to get a realistic shot of the jewelry piece without the reflection of colors. It will help in averting any white spots on the products. The umbrella lighting also helps in the disappearance of any camera reflection. Most of these kits perfectly fit every product photographer’s budget.

- Using Sturdy Camera Tripod
Your worst enemy is the camera shake. Most beginners face this condition when they are preparing the right setup. Sometimes they have to put a piece of jewelry just in their front and hold the camera. It can shake the very essence of photography. A camera tripod is one of the handy things to make things easier. It also helps maintain the right photography lighting set up for beginners. You can take the sturdy camera tripod with a removable tripod ball head. Unlocking the ball head will let you adjust the camera as you please. A few tripods help to adjust your camera freely and with ease. It will look something like this.
- Position The Natural Light
Most jewelry pieces are clicked in the artificial lights in the professional studios with umbrella lighting and tripod cameras. However, the jewelry stores that are newly opened and clicking photographs through iPhone or Smartphone can use the natural source of light.
The natural lighting is already set, and the photographer must adjust the product piece accordingly. Make sure no white spots or shadows are cast where the jewelry piece is kept. The light neckpieces and rings with gemstones can reflect white spots. A photographer needs to be vigilant about the same. Photographers can move the product closer to the camera to avoid any hindrances.
- Select The Right Aperture And The Camera Focus
Photographers using the macro lens for photographing jewelry must not think that the wider aperture will give them a brighter product image. More light may enter the lens with an aperture of f2.8 or f4, but the product will appear less in focus. So, a larger aperture is not appropriate for clicking the photograph of the jewelry piece.
If you want to capture the smaller details of the jewelry piece, select the aperture of f11 or f16. The smaller aperture will produce less bokeh and help reflect the full details of the jewelry piece. Whether it’s the gemstone or the piece’s color, everything will be captured with the right aperture lens. It will turn average-looking photographs into enchanting ones.
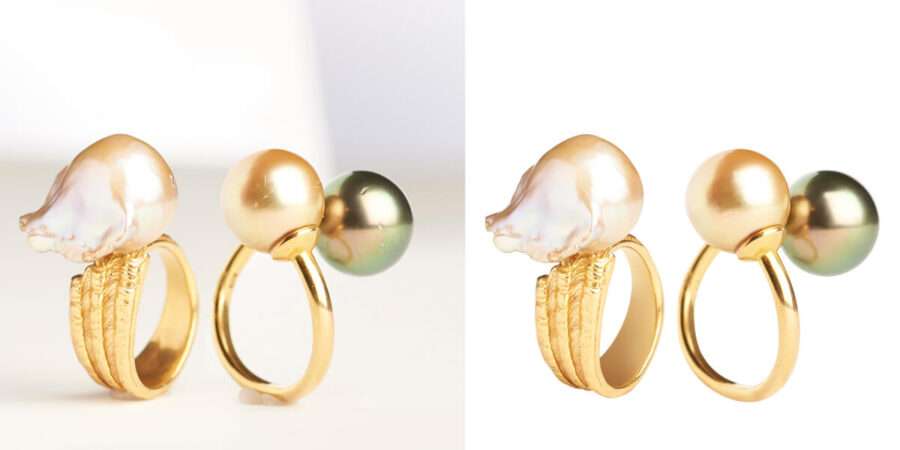
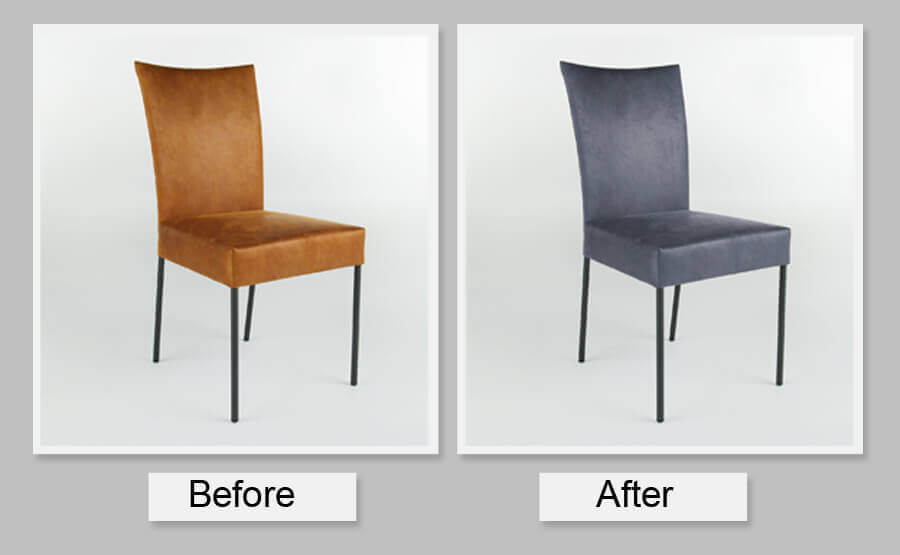
- Retouching the Product
After taking a photograph with the right macro lens, lighting, and aperture, now is the time to finalize the product. For this, the photographer needs to retouch the jewelry piece in many places to make it look incredible. Photographers can outsource the retouching services to a reputed agency or use the right tools for retouching and image enhancement.
The product retouching and processing will make the jewelry look attractive. Most photographers use the free online editing tools or are abreast with the basics. However, if you work for a high-end client, it is advisable to take professional retouching and image enhancement services.
Tips for Jewelry Photography
Now, you know the steps that go into clicking and setting the photograph for the jewelry pieces. After this, comes the tips for photographing jewelry that will help the store owners and photographers produce marvelous pictures.
- Set the Right Light Exposure
The lightness or the shadow on the image has a deep impact on the final outcome. So, exposure is the amount of light reaching the camera sensor. Good exposure for the image includes the right ISO, Shutter Speed, and Aperture. You must adjust and keep them at an angle to produce sharp images and keep away from blurry images.
- Develop the Consistency
To improve product photography, the photographer must be consistent with a few things. The photographer must document everything rightly, like the white background, camera settings, focus, lighting, and position of the products. The lighting is the major contributor, so it must be focused much. You can always use natural light to click the best photographs.
- Use Reflectors to Fill Darker Areas
You can use the light tent with quality lights to fill the darker areas in your jewelry pieces. It can be bought from any online store if you start your jewelry business. These light tents help to produce quality images and reach maximized sales. You can contact professional photographers whenever you have a great budget. A few companies do provide affordable retouching services for images too.
- Use Fewer Props
A stylish prop or a mannequin bust is excellent for showing how it will look on a buyer. If you use too many props, the jewelry pieces’ minute details will be missed. It can turn off your buyers as props take up much place. However, you can always use props to make things look great or remove them from the background when required.
Take Gorgeous Photos With Right Lighting!
Lighting is an essential element in product photography. Be it natural light or artificial light. You must ensure enough light is produced to cover every angle of your product. Jewelry pieces require an excellent focal length to showcase every part of the jewelry. Whether you are clicking a neckpiece or a ring, getting creative with the images and keeping them under proper lighting is necessary. You can always take the right image editing services from a reputed company like Clipping Path Arts. Call us for a complete consultation and all image editing solutions under one roof.

Such an insightful guide on jewelry photography! The detailed steps you’ve provided are incredibly helpful for capturing the intricacies and beauty of jewelry. From choosing the right equipment to mastering lighting and composition, your tips cover it all. As someone passionate about photography,