
DIY Photography- 7 Steps To Creating Amazing Product Photography
Need to put your apparel business to the next level? Try DIY Photography for your apparel store to represent your photographs to your immediate customers beautifully.
Pictures speak a thousand words- this is something every one of us knows. If you are running an online clothing store, then the clothing photography should be lively and speak about your brand to thousands of your visitors. The exciting photographs only determine whether the customers will purchase your products or not.
People prefer to buy online as it is convenient, and the products are delivered on their doorstep real quick. Moreover, online eCommerce stores offer products at affordable rates with many discounts running each month, which makes it more preferable.
So, the high-quality product photography is the backbone of any eCommerce business. They don’t only attract thousands of customers in a blink of an eye from across the globe but create brings transparency and create trust. You can even do this product photography in your photography studio too with some good experience in professional photography and right photography equipment.
What Is Product Photography?
Product Photography is mainly carried out for the eCommerce stores so that the products can become saleable. The professional product photographers, having excellent experience in handling photography tools and knowing how to use lighting in photography, carry out the process.
It makes the product look fabulous with a 360-degree view of the product. The viewers mostly appreciate an HD-quality image. DIY Photography is done by eCommerce businesses that have a modest budget but want to sell their products to thousands of online consumers.
If you are opting for do-it-yourself photography, then you can opt for the white background photography too. You can place your apparels against the white background over mannequin if there is no model and set the angles to click HD view photographs. Moreover, you can even hire a freelancer or an expert like Clipping Path Arts or also improve the errors in the images yourself through Photoshop and relative tools. For this, you must be well aware of this software.
So, if you are eyeing for the next shoot for your online clothing business and want to get great results, then follow these few simple steps to get on the product photography bandwagon. These significant steps will help you create stunning images of your products and that too with a DIY touch. Read below to get a detailed insight.
7 Magnificent Steps to Rock DIY Photography of Apparels
Now, here is an easy and exciting 7-step guide to help you get maximum out of your product photography for the apparel. Let’s get started!
Preparation of Your Garment
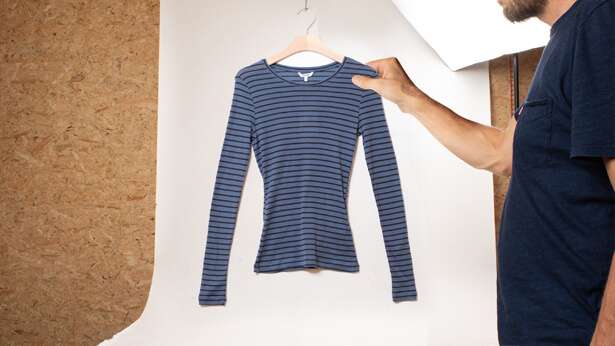
It is the foremost thing you must carry out that is preparing your garment. It is necessary to make your garment look great. Neither there will be creases all over the clothing visible during the shoot.
The wrinkles or creases occur if the product is straightaway coming from the storage house. As they are packed and then transported for a photo shoot so that it may look worn out. So, preparing your garment is the foremost thing before carrying out DIY Photography. It will also save your time from fixing every minute detailing of the clothing in the Photoshop or any other editing software. These types of editing software are not some magic tools but require advanced techniques to make your apparel look lively and natural.
So, doing some work off grounds as preparing your apparel for product photography can help you from compromising your product image quality. It is important to shoot your product in the right state as steaming can help with it too. Moreover, if you see any tags or stickers that you do not require on the garments, it’s good to remove them. If there is some dust or the strings attached, remove it too or use tape to fix everything.
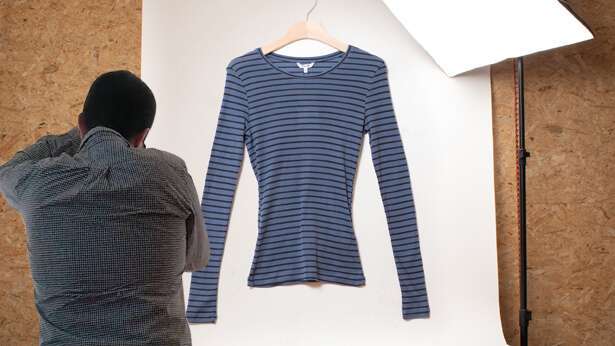
Setting Up Your Photography Studio
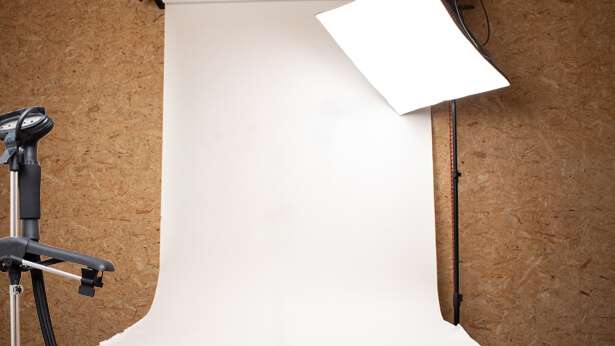
Another most crucial thing while carrying out apparel photography. You can set up your studio with minimal equipment for your clothing photography. If you are on a tight budget, then convert any room into a photo studio with a camera, duct tape, a white paper, and the natural light.
In case you have a little loose budget on your hand then investing in some more pieces of equipment or shoot will help with your DIY Photography. You can even add a mannequin. Alternatively, you must know how to take pictures of clothes without a mannequin. Here’s what more you can add to your photography studio:
- A Suitable Background: You can opt for a light grey background or white background photography to make sure that there are no distractions, and the colors of the product are captured beautifully. You can get the rolls of the whitepaper that are cheap or ideally suited for the photography environment. It is essential to nicely spread this roll on the floor, prevent any types of creases, and affix it using the tape. Moreover, using a tripod stand will make the photography more flexible as you can focus upon the product efficiently and even sticking the white paper roll to the walls or ceiling will also avert any distractions. The position of your mannequin or the model with the product should be placed directly in front of your camera.
- Position the Camera: The camera is a vital part of the photography studio, but using it alone is not going to bring success in your product photography spree. It is just one piece of equipment on which you must not spend your entire budget. You can get any budgeted DSLR with minimum settings, aperture settings, and manual exposure. You can use an inexpensive alternative too that is your Smartphone. Moreover, to maintain the consistency of your photoshoots using a tripod is a great idea. It frees your hands to be used for other tasks too but again does not go out of your budget to purchase one. It is necessary to have the camera or tripod in your room as it will be used throughout the shoot, and for different angles of the product, you can move it around.
- See the Lighting in the Room: Using natural window light is another inexpensive source of lighting for you. The reason being it provides the perfect lighting effect for your photoshoot. But, if your room does not have a large window or minimal source of lighting the getting a lighting kit is quite essential.
The lighting equipment photography will help you to shoot without any hassle. If there is a versatile lighting effect, then it will increase the photography efficiency but consistent lighting effect will support the professional standards. For setting up the lighting in the photography room, you require a C-stand, light head, softbox, pocket wizard, and battery pack.
A moonlight works better for product photography, but it is quite expensive so the photographer must choose it wisely according to the budget. Other things like a softbox will help in excellently capturing your apparel, the pocket wizard will help in synchronizing the light and the camera by turning its light head into a flash, c-stand is light.
Positioning Lighting For DIY Photography
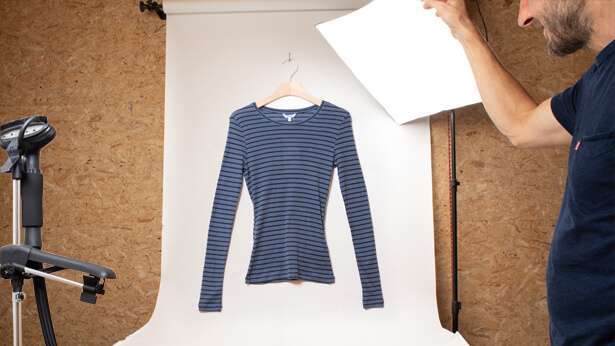
If you are wondering how to use lighting in photography, then this is the foremost question that comes in everyone’s mind while carrying out product photography. The light plays a crucial role in photography as it can make your product photography tremendous or ruin it altogether.
Now, let us discuss how to use the proper lighting effects. If you are using the natural light, then it is better to position the product near the window so that there is indirect light falling over it and not direct.
But, if you are using the artificial light source, then place the moonlight setup or the soft-box at a 45-degree angle from the product so that it must look even and soft. The camera must be placed directly in front of the project. To carry out clear photography, you can either remove background or place the product away from the backdrop so that you can achieve a clean background.
Moreover, you must know the adjustments of the camera light meter too and settings must be adjusted to make it reach out to ‘O.’ Even you can use the handheld light meter so that you can read the light system read seamlessly.
You should tweak your camera settings also if you want the perfect photographs from every angle. Moreover, recharging your camera between the shoot can also help with the battery life since shooting the photos too fast can also affect your light source.
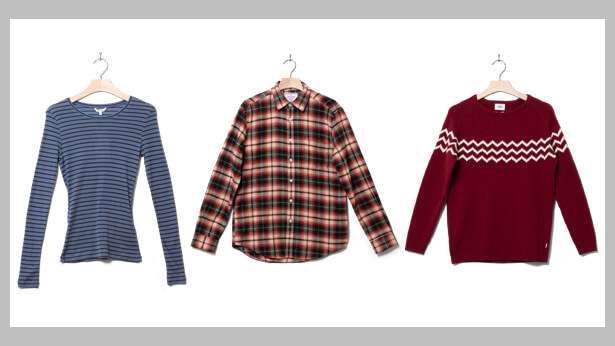
Styling the Garment for DIY Photography on Model or Mannequin

Well, this is the best way in which you can encourage the customers to seek how the garment will look when they will wear it. A model or a mannequin is the best way to display the garment and the sizes too.
As you know that when the model wears the apparel, they can bring that to life, but it can prove expensive for the businesses that are running on a low budget. So, mannequins are the best options to work with as they prove inexpensive and affordable for clothing photography. You must take time to style your product on mannequin too like if it is a loose fit, try to style it by fitting with the help of a pin or tucking it nicely.
However, if you feel that the mannequin will make your product look cheap, then in the post-processing of the photograph, you can use the “invisible mannequin technique” to make the garment look great. Even taking a few more shots from different angles can help you with the presentation of your product image into a 3D image that nicely demonstrates the fitting of your garment.
Setting Up the Camera
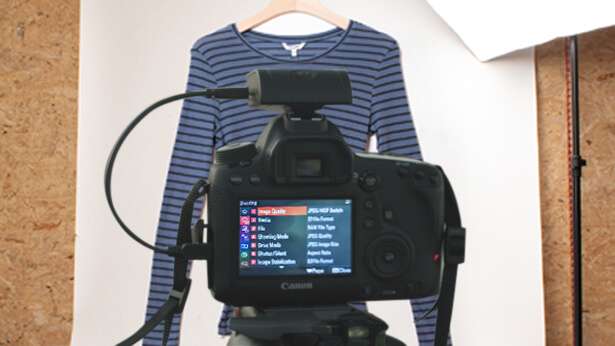
Setting your camera in the right manner is an essential aspect of product photography. It will help in making your images look professional as well as an understanding of aperture, ISO, and white balance will make your photograph look beautiful. Let us now take a sneak peek into these techniques:
- Aperture: It is represented by the “f” numbers on your camera, and it is used for adjusting the focus. Generally speaking, if the photographer is using a more significant focus, then all the features of the product image will remain in focus. It is upright to set up the focus more than f/11 to get your product photograph in complete focus.
- ISO: The ideal setting of ISO must be between 400 and 600. The higher the ISO source, it will produce ‘grain’ (these are colored or grayish speckles that make the picture look flimsy) or even more ‘noise’ too. Along with this, the higher ISOs make the worse noise, and they can make the image details looks soft rather than making it look sharp. For maximum sharpness and clarity, use a tripod and keep your ISO between 100 or 200.
- White Balance Photography: If you see any product image that reflects an orange or blue filter, then the white balance must be off in it. In its absence, the camera may not determine the pure white color. Even the white balance supports the camera settings and also interprets the color reflection. The light sources with which it works best is fluorescent, LED, natural sunlight, and tungsten. The white balance can be set up manually for any light source, or it can be set to AUTO to decide which source to opt for. Must not forget the white balance as it may become difficult to recreating the accurate colors in images during post-processing.
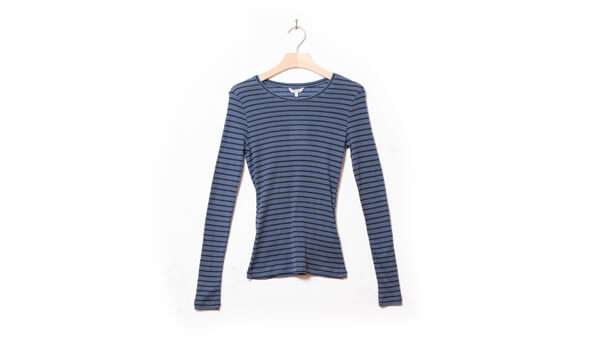
Carry Out DIY Photography or Shooting Process
So, this is the moment you have been waiting for after working hard with your garment and camera setting that is shooting for the apparels. Here’s how to carry out product photography.
Direct the camera at the product, press upon the “shutter release button,” allow the camera top to put the focus, and snap it out. It is mandatory to adjust your camera settings throughout the shooting process as you need to seek when the product image requires more lighting effect or less lighting effect. Moreover, in your photography studio, you can click various forms of images using different angles to make them look more beautiful and upright.
Even you can shoot as many images you require until you get the desired result, which can be clicked from the right, front, back, sideways, or by using a 45-degrees angle. The more shots create better results since more the images in a number of the products, and it makes the product look quite saleable too. Even the product photographer gets lots of options to select from. Moreover, the website customers also trust the brands that showcase product images from different and wider angles.
Post-Production of Product Images
In this final step, you can make your images look more professional and optimal. It includes various techniques like cropping, alignment, setting the background and color, final touches, and much more. This will help in making the apparel look in excellent shape and quite natural too. If you have not adequate experience with photo editing tools, then you can hire the professionals like Clipping Path Arts to provide a significant effects to your product images.
Let’s discuss the different techniques in detail.
- Set Alignment: In this process, make sure that all the images are of similar size and centered within each image too. The corners, edges, and angles must be aligned and set about one another. You can also create alignment guidelines in your Photoshop too.
- Cropping: You must identically crop the product images so that customers can enjoy seamless shopping. By using guidelines for the alignment, the cropping becomes easier in Photoshop.
- Background Setting: Experts recommend white background photography. It will help you in removing the background seamlessly and will allow more flexibility in your web designing process. Besides, it will also reduce your file size.
- Color Contrast: While editing, you must take extra care of the colors as the inaccurate display of color may make the consumer frustrated. You can tweak the colors a little bit, but not much. Converting your images into SRGB format will also save your colors from getting turned by various websites or computer screens.
Are You Ready for DIY Photography Now?
If you are not a professional, then DIY Photography may sometimes become a big challenge. But, if done systematically and with expert advice, then it can bring the best out of your work. As it is said, the experience is the best teacher, so shoot more and get the perfect image that engage your visitors and convert them into buying customers. By following the above steps, you can be proud of the apparel images you have shot.

I spending a whole week trying to get the best photograph for my products and it’s so damn hard. All the photos come out ugly.
I learned so much not just about product photography, but also many mindsets and I am feeling more confident. Thank you so much for your helpful post.
Really awesome blog helping hand and good content keep it up awesome
So an impressive blog.
Great Value from this Blog
Really helpful guide! Clear steps and practical tips for improving DIY product photography. Thanks for sharing!
Such a valuable resource for small business owners like me! Creating polished product images without expensive gear is a game-changer—and your editing suggestions sealed the deal.