
Photoshop Retouching – It is Art and It is Technique too
Photoshop Retouching is an amazingly versatile service. It can radically transform images or just subtly enhance them. It depends on how you use this fine tool. As they say, a knife-wielding sculptor can use the tool to carve beautiful images whereas another person using the same knife simply hacks things into small pieces. Here are a few images that show Photoshop Retouching as one of the best photo retouching tools.
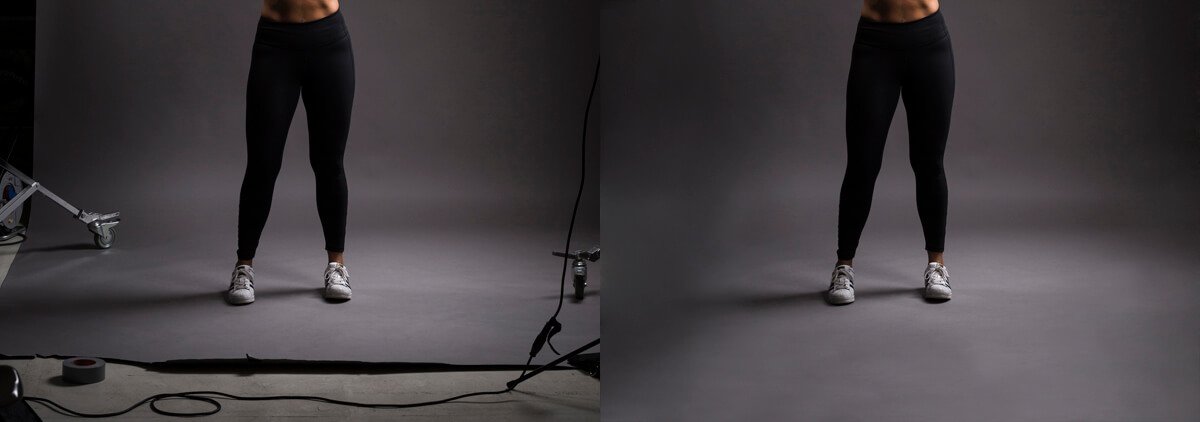
The left image above shows the image as it was captured by the camera. There are undesirable elements crowding the visual space. Besides, the corners and sides are darker adding to a closed-in vignetted feel. Photoshop’s masking tool can be used to select the objects and cut them out. A simpler method would be to use the clone stamp tool and pick a tonal area and then simply stamp over the undesirable objects. Then one can blur the area around the legs using masking and blur or one can pick a suitable color and spray.
This can be further fine-tuned by masking or layer masking and then adding a bit of texture. Expert Photoshop retouching services select a method that suits the image and meets the goal of the creative agency. The image at the right appears entirely unnatural and unretouched.
Jewelry Retouch
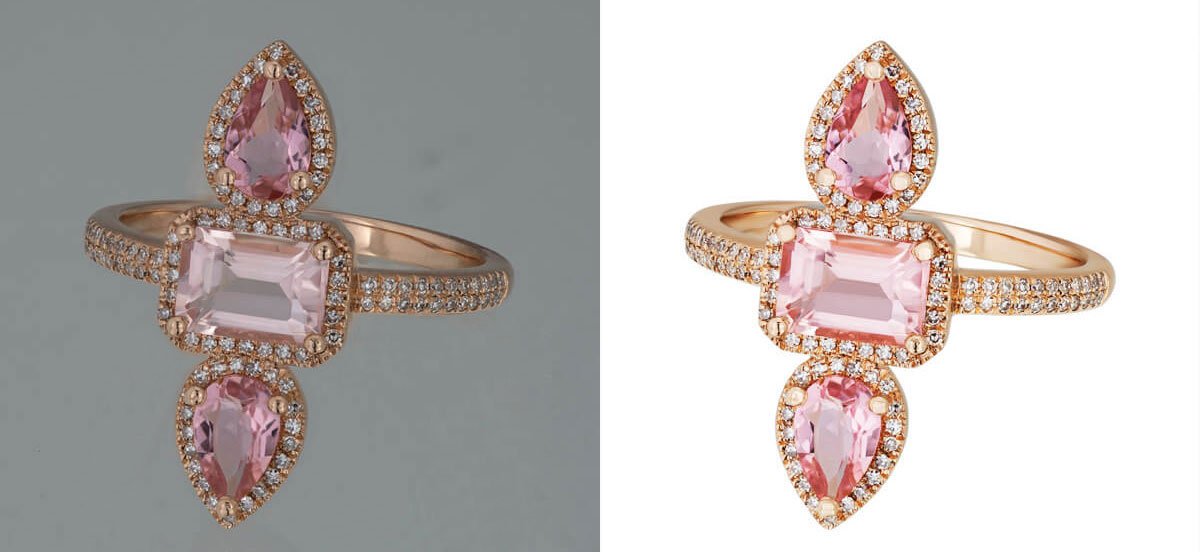
It really needs an expert photographer to arrange lighting to bring about the best in jewelry. Photographing jewelry is tough because of the highly reflective surfaces of jewels and metal. For professional photo retouching services, it is not too difficult a task to carry out jewelry retouch and remove imperfections besides removing the background and unwanted reflections. The image at left shows an unretouched image which shows it set against a neutral background, some light flare, and a generally dull appearance.
Experts in photo touch up use combination of the lasso, magic wand and pen tools for precise selection of the jewelry after creating a duplicate layer and then the part that shows light flare is removed by careful selection and brushing over. One can also use the clone tool. There may be further processes to check for washed-out highlights and restore them. Tiny jewels need to stand out and a step could include enhancing micro-contrast along the edges using high pass rather than plain sharpen and then use vibrancy and clarity sliders. Photoshop retouching is all about the clarity of a product or object maintaining natural impact intact or getting rid of unwanted parts of an image.
Model Basic Retouch
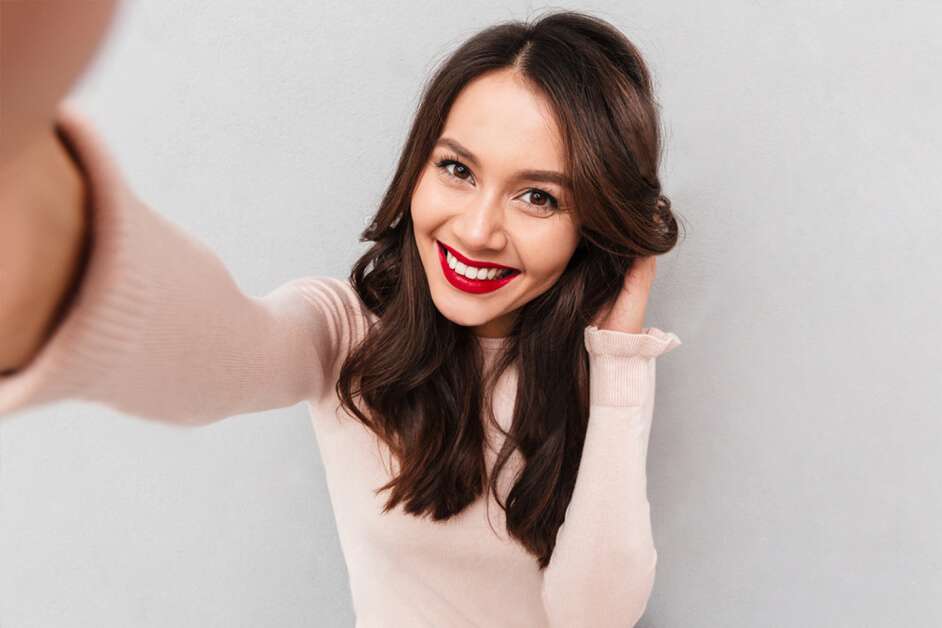
There is plenty one can do in Photoshop for model Photoshop Retouching. It can be quite extended, making a slim model look a bit filled out or vice-versa, a dark model could become lighter in color or the other way round, wrinkles can be made to vanish and one can change the color of the eyes and make the skin flawless. Even if one does not go in for extended steps to actually remodel a model’s looks, one should, at the very least, carry out some processes and give a beauty retouch to the photo. A few basic steps would involve selecting the areas on the face and adding some blur to hide pores and other blemishes.
Eyes area can be masked or a sharpening brush is chosen to make the eyes and eyelashes stand out. As can be seen, the lips of the model do not stand out so they can be masked with a pen tool and the color is given a bit of saturation boost. Similarly, hair can be masked with alpha channel selection and color enhanced, equalized in tone, given a bit of contrast and sharpened. It depends on the creative director’s brief to the specialist in beauty retouch who does it in a way that makes the image appear unretouched.
Model Beauty Retouch
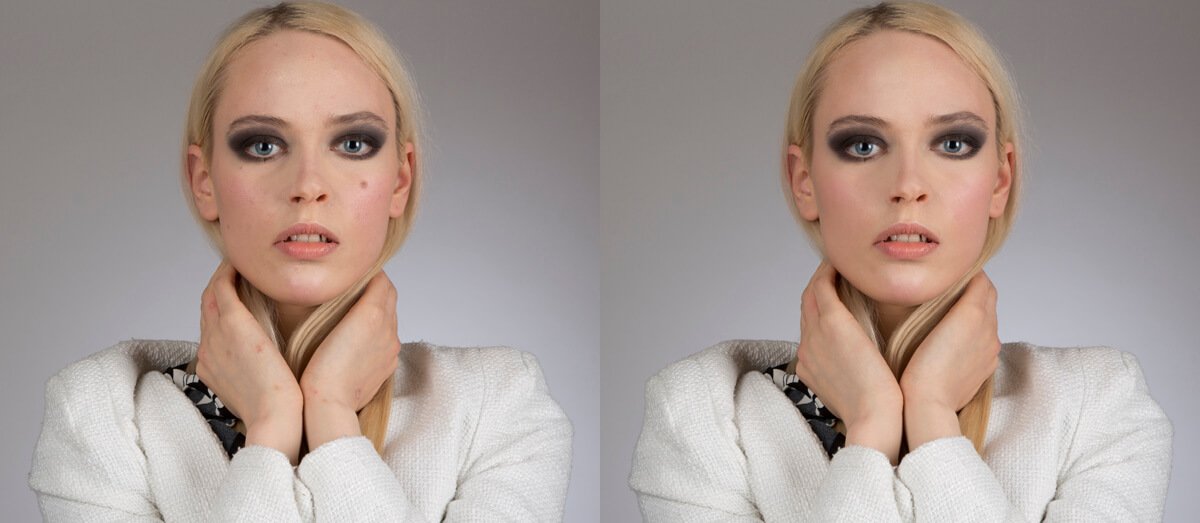
The above image of model Photoshop Retouching is interesting and presents quite a few possibilities to bring out the best. Of course, the maximum can be derived from using ACR or Lightroom with RAW images. However, one can work on jpegs too in Photoshop for high-end retouch. Start with the hair. A major portion is in shadow with no detail. One can selectively mask hair after creating a duplicate layer and use shadows and highlight sliders to bring out tone even in the shadow areas.
Adjust mid-tone contrast and add a bit of color saturation boost. The skin, as can be seen, is highly reflective and highlight areas can be washed out. These areas are masked by professional photo retouching experts and then one can use a brush, pick the color from adjacent skin areas, adjust transparency and brush thickness and brush over the shiny spots. There are fine lines under the eyes. These can be smudged or brushed over for a smooth tone. Lips areas can be masked and color saturation enhanced after removing the shiny glare.
The area on the right side below the eye does not form the ideal triangle of light. Here there is an interesting possibility. The right side can be lightened to show details or, it can be further darkened for a hint of mystery and allure. The eyebrows, eyelashes, and pupils can be sharpened using sharpening brush while the skin areas are masked and blurred. A real touchup artist will lavish time and attention.
Product Basic Photoshop Retouching
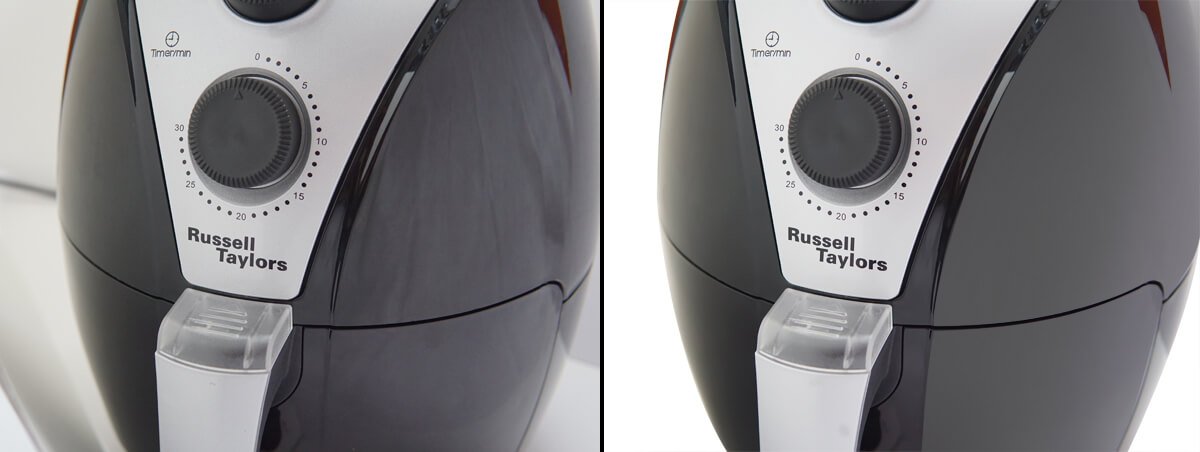
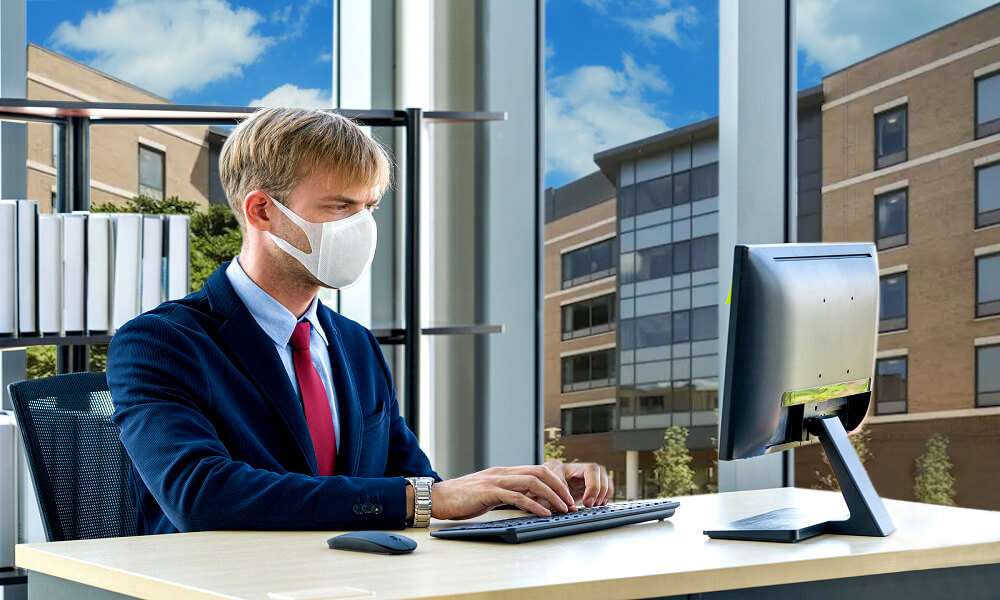
Products must “put their best foot forward” in order to motivate viewers to buy. However, a bare photograph has some flaws that professional photoshop retouching can remove and make the product stand out. It starts by removing the background by using the pen tool and adjusting nodes and pulling the ears to fit contours of the product. The grey areas have some imperfections obvious on the right side areas. This area is selected using pen masking and then we use the brush, eyedropper to select the right shade of grey and then paint over the selection.
Then one can use a gradient adjustment layer to make it look as the product is lighted from the back and to the right. One can just as well texturize the dark grey masked areas for a touch of realism. Whiter areas are selected and either lightened in tone to create contrast or, if the art director wishes it, lighter areas may be darkened just a little bit. One can use sharpen brush to selectively sharpen certain areas or use high pass filter.
Removing Bad Reflection through Photoshop Retouching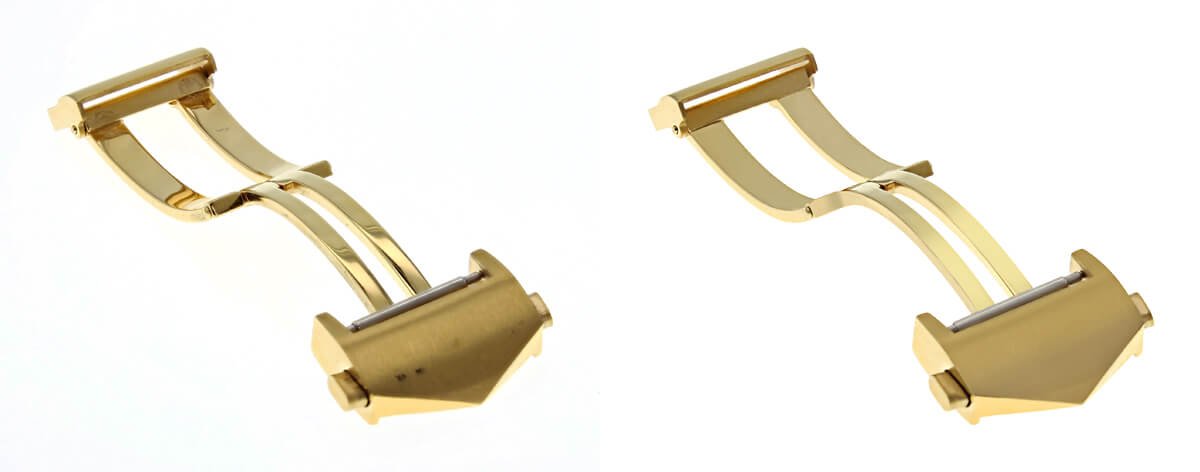
Actually, the photographer should take care of lighting so that glare and bad reflections do not detract from a photo’s appeal as far as Photoshop Retouching is concerned. However, this type of reflection may be unavoidable due to the product contours. High-end retouch experts may use discretion in deciding which types of reflections are allowed to remain. The dark band in the triangular area at the front of the image is undesirable.
It can be masked and then an eye dropper is used to select the right color and then a brush with softness and spread settings is used to brush over the darker areas to a lighter shade. One can fine-tune this by fine blending and feathering to achieve a seamless look. The highlight may look rather aggressive and the thick line may be thinned down by appropriate selection tools and brushing or using an adjustment layer from selection and reducing brightness/contrast. Choose high-end Photoshop retouching services and your images truly stand out, looking un-Photoshopped when in fact they are.

We offer affordable prices and significant discounts for bulk professional photo editing services. We charge reasonably for our service and provide the most reliable and top-quality service. We provide image editing, Graphics design, Video Editing, Web Design, and Development services. We care for our customers, their time, and their cost!